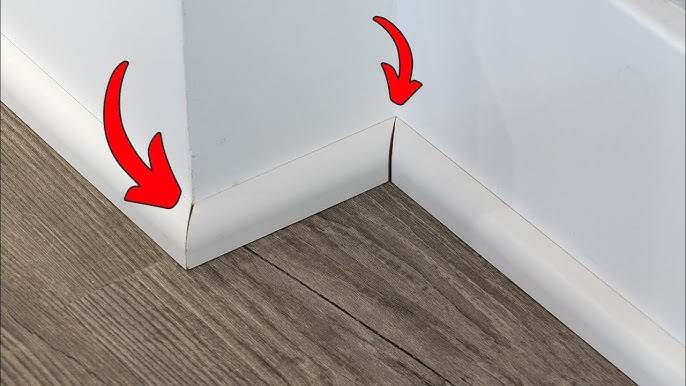
This article discusses the steps to achieve the perfect fitting miter angle on baseboard and crown moulding. The author explains that obtaining an accurate miter angle is crucial for a seamless and professional-looking finish.
To begin, the author suggests measuring the corner angle using a bevel gauge or a digital angle finder. This step is essential as walls are not always perfectly square, and accurately measuring the angle will ensure a precise miter cut. The measurement obtained will serve as a guideline for adjusting the miter saw.
Next, the author highlights the importance of adjusting the miter saw to match the measured angle.
This can be done by loosening the bevel or miter detents and aligning the saw blade with the desired angle. The author advises double-checking the angle before making any cuts to ensure accuracy.
Once the miter saw is adjusted, the author recommends making test cuts on scrap pieces of baseboard or crown moulding to verify the fit. These test cuts allow for adjustments if the fit is not perfect. By continually fine-tuning the angle on the miter saw, the author assures that achieving the perfect fit is possible.
In terms of cutting techniques, the author advises cutting the trim slightly longer than necessary, as it can always be trimmed further if needed. This approach prevents the need for starting over in case of errors. Additionally, ensuring a clean and square cut is crucial for a tight fit. The author suggests using a sharp blade and taking the time to make precise cuts.
Furthermore, the author emphasizes the importance of using a coping saw for inside corners of crown moulding. Coping involves cutting away the back edge of the trim to fit it snugly against the adjoining piece. By following the line of the profile, a coped joint can create a seamless connection.
In summary, obtaining the perfect fitting miter angle on baseboard and crown moulding requires careful measurement, adjustment of the miter saw, and test cuts. Cutting techniques, such as making slightly longer cuts and using a coping saw for inside corners, are also essential for achieving a professional finish. By following these steps and taking the time to ensure precision, one can achieve a flawless outcome.
