Installing laminate flooring can be a great DIY project for beginners. Laminate flooring is a popular choice for many homeowners because it is affordable, durable, and easy to maintain. This article will provide a step-by-step guide on how to install laminate flooring for beginners.
The first step in installing laminate flooring is to prepare the subfloor. The subfloor should be clean, flat, and level. If there are any areas that are uneven or damaged, they should be repaired before installation. Once the subfloor is ready, a moisture barrier should be installed to protect the laminate flooring from any moisture that may come up from the subfloor.
Next, the laminate planks need to be acclimated to the room where they will be installed. This is done by leaving the planks in the room for at least 48 hours to adjust to the temperature and humidity of the space.
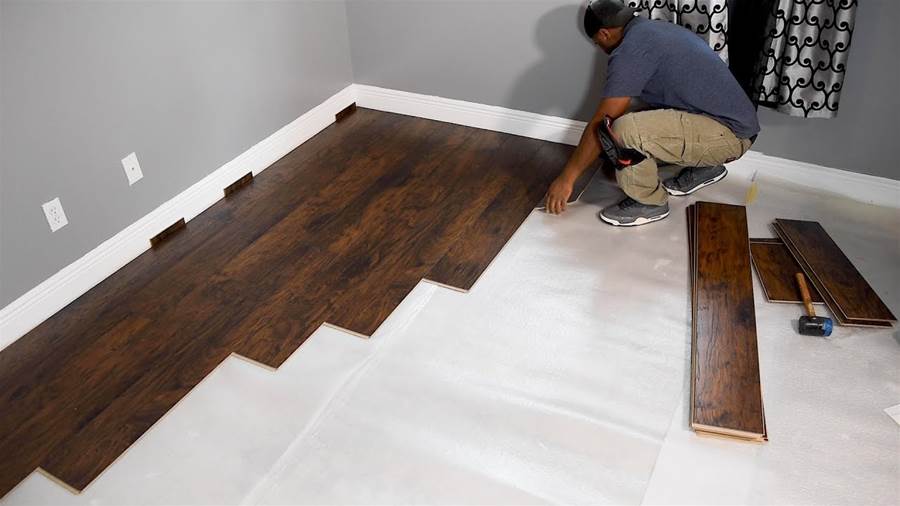
After the planks have acclimated, they can be laid out in the desired pattern. It is important to leave a small gap between the plank and the wall to allow for expansion. Tongue and groove joints are used to connect the planks together, and a tapping block and mallet can be used to ensure a tight fit.
Once the planks are in place, the final step is to install the baseboard and transition pieces. These will cover the gaps between the laminate flooring and the walls or other flooring types. With all the steps completed, the laminate flooring is now ready to be enjoyed.
Installing laminate flooring may seem daunting at first, but with the right tools and instructions, it can be a rewarding DIY project for beginners. By following these steps and taking the time to properly prepare and install the laminate flooring, homeowners can enjoy a beautiful and durable flooring option in their home.
