Vinyl plank flooring is a popular choice for homeowners due to its durability and easy installation process. However, many people have questions about how to properly install the flooring around vent duct openings. This article will provide a step-by-step guide for beginners on how to tackle this task.
Before starting the installation process, it is essential to gather the necessary tools and materials. You will need the vinyl plank flooring, duct opening cover, a utility knife, a measuring tape, a pencil, and adhesive or double-sided tape.
The first step is to measure the size of the vent duct opening.
Use a measuring tape to determine the length and width of the opening. Next, transfer these measurements to the vinyl plank flooring. With a pencil, mark the dimensions on the plank that will cover the vent.
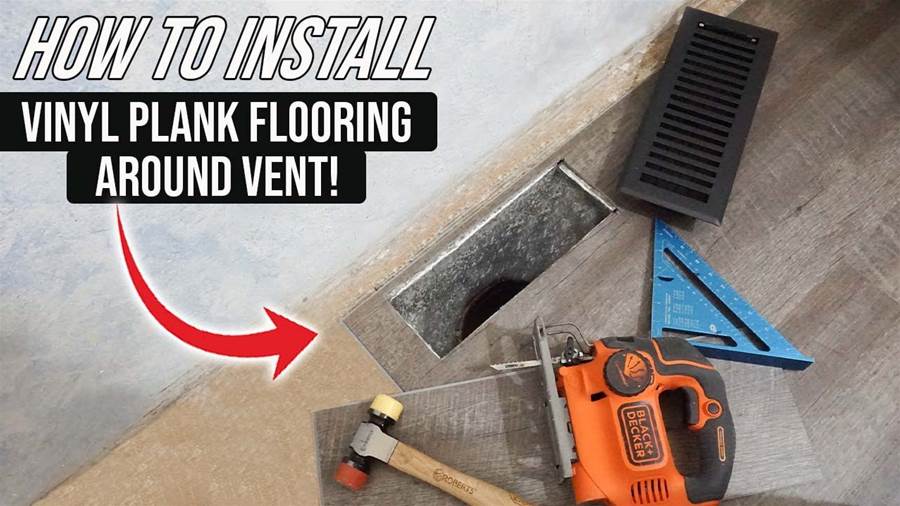
Using a utility knife, carefully cut along the marked lines on the vinyl plank flooring. Make sure to make clean and precise cuts. Test the size of the cut piece by placing it over the vent duct opening. If it fits perfectly, proceed to the next step.
Apply adhesive or double-sided tape to the backside of the cut vinyl plank piece.
Make sure to cover the entire surface evenly. Carefully position the cut piece over the vent duct opening, aligning it properly with the surrounding flooring. Press down firmly to ensure a secure bond with the subfloor.
To cover the gap between the vinyl plank flooring and the vent duct opening, install a duct opening cover. These covers come in various sizes and designs, so choose one that matches the style and dimensions of your flooring. Simply place the cover over the opening and secure it in place according to the manufacturer's instructions.
Repeat the same process for all the vent duct openings throughout the room.
Take accurate measurements, cut the vinyl planks accordingly, apply adhesive or double-sided tape, and position the pieces over the openings. Finally, secure the duct opening covers to complete the installation.
Installing vinyl plank flooring around vent duct openings may seem intimidating at first, but with proper guidance and the right tools, it can be a straightforward DIY project. Remember to measure accurately, make precise cuts, and use adhesive or double-sided tape for a secure installation. By following these steps, beginners can successfully install vinyl plank flooring around vent duct openings and achieve a professional-looking result.
