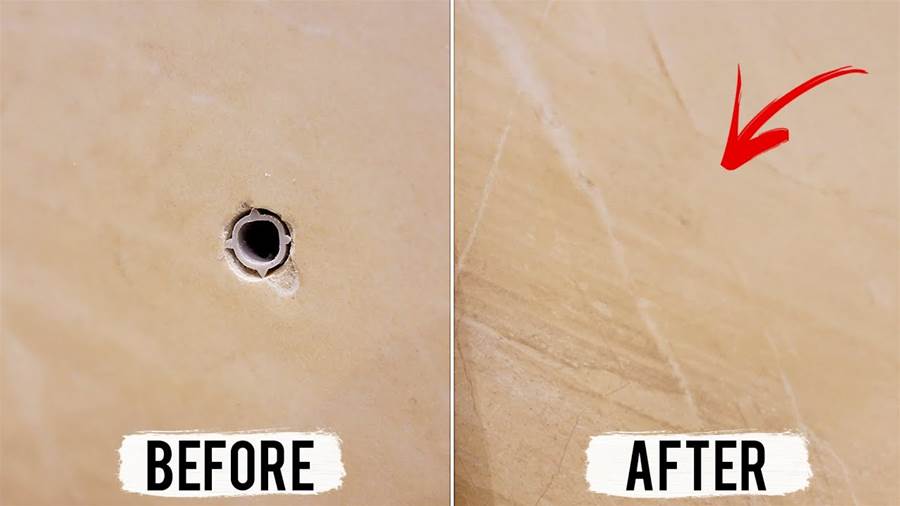
If you have drilled holes in your tile and want to restore them yourself, we've got you covered with these DIY tile repair steps. Restoring drilled holes in tile may seem like a daunting task, but with the right tools and techniques, it can be done easily.
To begin, gather your supplies. You will need a drill, drill bit, cleaning solution, adhesive, putty knife, sandpaper, and matching tile pieces. Before starting the repair process, clean the area around the hole thoroughly with a cleaning solution to ensure proper adhesion.
Next, choose a drill bit that matches the size of the existing hole. Using gentle pressure, drill into the hole, allowing the bit to remove any loose debris.
Be careful not to drill too deep or apply excessive pressure, as this can damage the tile further.
Once the hole is clean, apply a thin layer of adhesive inside the hole, ensuring full coverage. Use a putty knife to smooth out the adhesive and remove any excess. Allow the adhesive to dry according to the manufacturer's instructions.
After the adhesive has dried, sand the repaired area with fine sandpaper to create a smooth surface. Wipe away any dust or debris, as this can affect the appearance of the repaired hole.
Finally, if the repaired area is still visible, you can carefully replace the missing tile piece. Using a putty knife, apply adhesive to the back of the replacement tile and carefully place it into position. Use gentle pressure to ensure proper adhesion. Remove any excess adhesive and allow it to dry.
By following these DIY tile repair steps, you can easily restore drilled holes in your tile and maintain the overall aesthetic of your space.
